The ECaccess gateway HTTP/S interface allows Member States to manage their job submissions and file transfers from their Web browser, e.g. Firefox, Mozilla or Internet Explorer. This section gives an overview of what this interface provides and how it works. Please note that only interactive authentication as described in Security authentication is supported. The main purpose of the HTTP/S plugin is to provide easy access and monitoring for on-line users. For use from within shell scripts (batch), most of those features are also provided through the FTP plugin and are described in the previous sections.
Assuming that the Member State ECaccess gateway (see Ecaccess concepts) runs on the server "ecaccess.meteo.ms", users connect to the application by pointing their Web browser at "http://ecaccess.meteo.ms:9080/" and will be redirected to the login page. Note that the default HTTP port number used for ECaccess is 9080.
By giving an ECMWF user identifier and a passcode, the user is authenticated and routed to a personal page; a user context is maintained for the subsequent operations from his browser. Users have the ability to request everything available from their account, until the time allocation expires or the "logout" option from the "Account" menu is selected.
Users connecting for the first time to the login page of the Web server will receive a security alert from their browser. This is normal; users have to accept the HTTP/S plugin certificate as a trusted certificate to allow the encryption of communications.
The procedure to trust the certificate depends on the browser:
Once this procedure is complete, your future connections to the HTTP/S plugin will not produce any security alerts.
After successful authentication users are redirected from the login page to the main page, from which they will be provided with a menu including available operations described in this section. Note that the ECaccess gateway administrator can set up the HTTP/S plugin to secure only the login process. Therefore, when redirected from the secured login page to the unsecured main page you may receive a security alert. This is a normal message; just select the Äccept" option to continue. The main page provides the following options (organized through menu entries in the left margin): Browsing menu
Queues/Jobs menu
Monitoring menu
Account menu
The following snapshots illustrate a typical interactive session a user could have using the web interface.
Different browsers on different operating systems may have different presentations of the same page. First, under the heading "Web session", login by providing your ECMWF user identifier and your passcode. You may modify the default value of 30 minutes to a greater value, if you plan to use the service with breaks of more than 30 minutes.

Once authenticated, your browser is redirected to the main page containing the menu described in the previous section (the default option is "Browsing > ECHOME files"). To browse other directories from your home directory, select a target directory and press the "Browse" button.

To download a file from your current directory (./gribex in this case), click the transfer icon of the target file in the list. To upload a file into your current directory select the "Upload files" option and click the "I want to" button.

Click the "Browse" button and select the file (E:\fortran.txt) you want to upload to your current directory (you may repeat the operation three times if you want to transfer more than one file). Then click the "Upload local files to your target directory".

Once uploaded, a summary is printed to inform you of the size of the files uploaded. You may click the "Browse uploaded files" to return to your current directory (where your files have been uploaded).

You can see the "fortran.txt" file is now stored in your current directory. You can continue browsing directories and repeat the operation as many times as you need. To submit a job, you should first choose which system at ECMWF you want to use. To have a list of the systems at ECMWF supporting a batch service, click the "Browse queues" button.

The queues shown are known as ECaccess queues. For each of these ECaccess queues, you can click on the "show details" icon to see its associated batch queues on the system at ECMWF, e.g. below for the ECaccess queue hpcd:

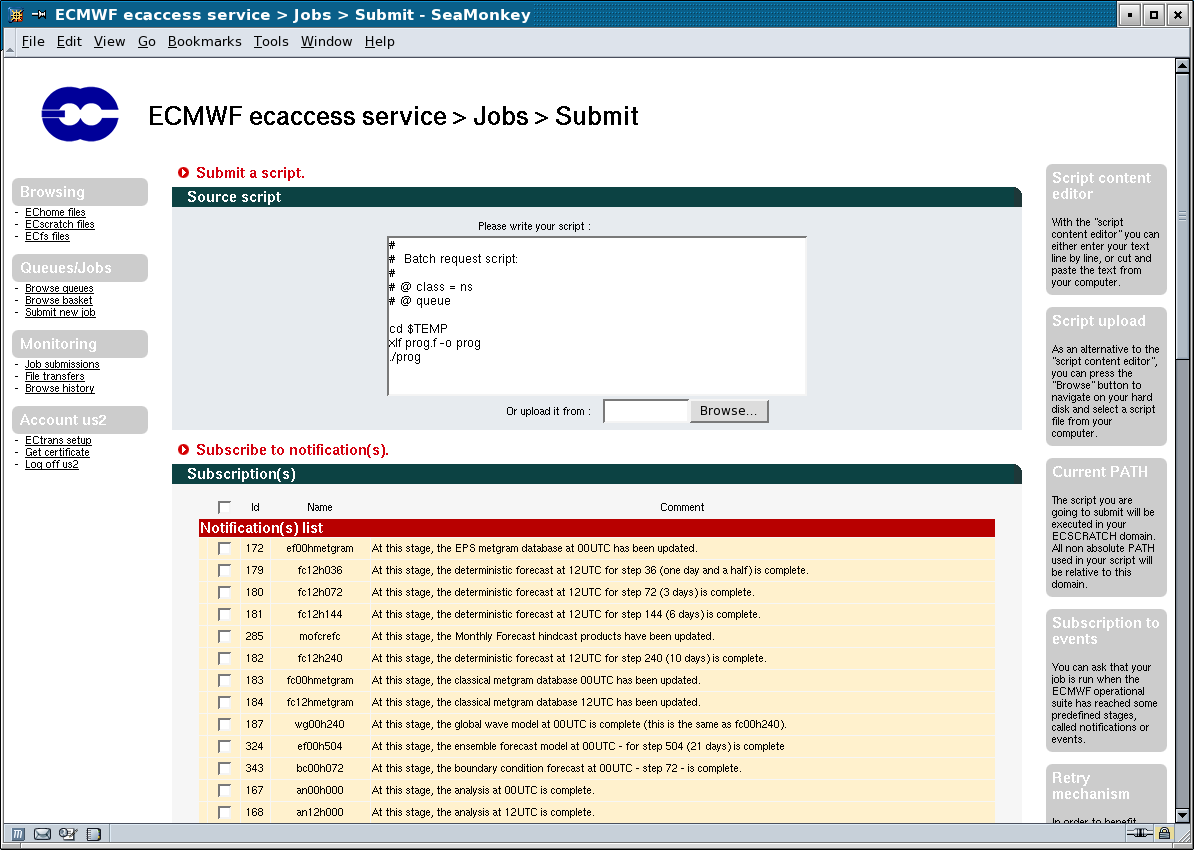
To submit a new job, select the "Submit new job" option in the "Queues/Jobs" menu.

You may enter your script in the text area provided or select a script from your computer. Select the target queue ("hpcd" in this case). Note that the batch queue (or class) and other batch directives have to be included in your script. Alternatively, you can inform ECaccess that your script does not contain batch directives. In this case, default values will be used and ECaccess will fully manage your submission. Once your script is read, click the "Submit job" button to send your request to the server. The list of notifications allows you to attach your job to one event in the ECMWF operational suite. Please refer to the Web page on submission of time critical jobs for further details.

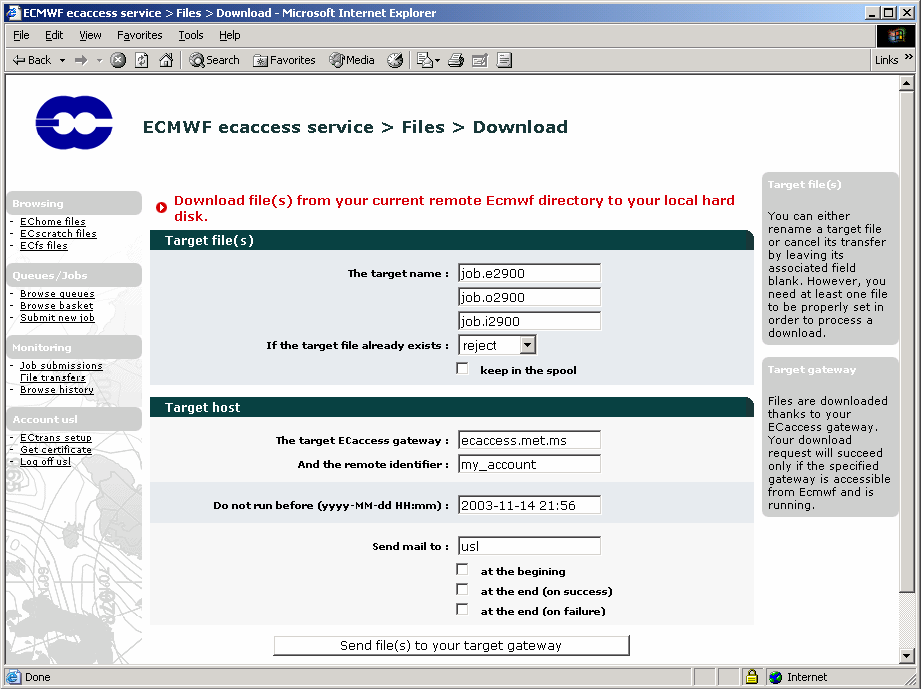
Once the job is submitted, a summary screen gives you the job identifier number of your new job request. It can be used to reference the submitted job using the monitoring interface (described in the next section). If you want to arrange a secure file transfer of the result, click the "Transfer with Ectrans after execution" button.

If required, modify the default values (gateway name, user identifier) and specify the erase option of the secure file transfer (erase option is discussed in Unattended file transfer - ectrans). Then click the "Send file(s) to your target host" to proceed.

Once it is spooled, a summary screen gives you the copy identifier number of your new transfer request. It can be used to reference the secure file transfer using the monitoring interface (described in the next section).

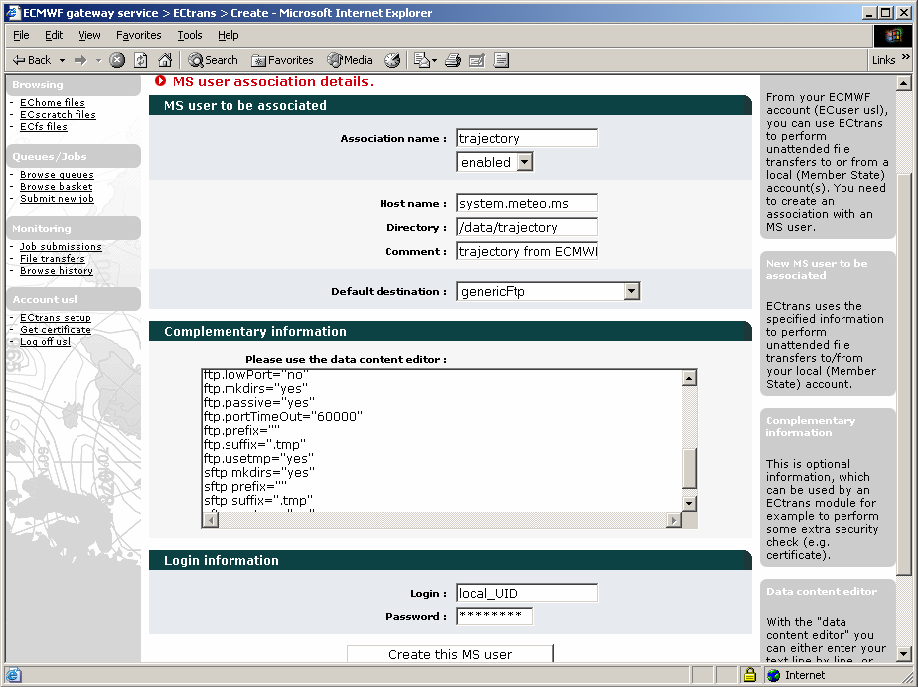
Before being able to launch unattended transfers from ECMWF (Unattended file transfer - ectrans) back to your site, using the command ectrans, you will have to configure an ectrans association between your ECMWF User ID and the remote system and user-id. This is done through the web interface, by clicking "ECtrans setup" from the lower left panel.

To create a new association, click the "Add association" button. Choose an Association name, "trajectory" in the example below. This is the name that will be used as association (previously know as 'msuser') with the ectrans command. Fill in the remaining info, giving the required information on your local system. In the example below, we create an association named trajectory that will be used to transfer files using ftp by default to a local system named "system.meteo.ms" as a user local_UID. The data transferred will be written into the directory /data/trajectory. The local files will have a temporary suffix ".tmp" added to their names during the transfer. Note that you can change the configuration of the ectrans association by modifying the options given in the window titled "Complementary information":

When you have entered all the information for your association, click the button "Create this MS user". A new association has been defined for you. Please note that (between all users) an association name can be defined only once per gateway. You can define more associations, e.g. to transfer files from ECMWF to different systems or other local UIDs. You can also allow other users at ECMWF to transfer files with ectrans to your association. To do this, click the "Grant Association(s)" button:

Select the association to which you want to give access to another user. Enter the ECMWF user name. Then grant the association.

The UID and name of the person you have given access to the association is now added to the list. To remove an entry from the list, click the "Remove from the list" icon on the left:
