...
| Info |
|---|
The content of this article only apply to the users of the EUMETSAT part of the EWC. |
| Table of Contents |
|---|
Pre-requisites
| Warning |
|---|
Setting up SFS in a tenancy can be done only by users with ewcloud-tenant-admin role! |
Ticket
SFS should be available for tenants created after 28/10/2022, if the tenant is older and you wish to use SFS, please open us a ticket here.
1. Create Server Openstack SFS
1.1 From Morpheus go to Infrastructure → Storage, select the Servers tab and click +ADD
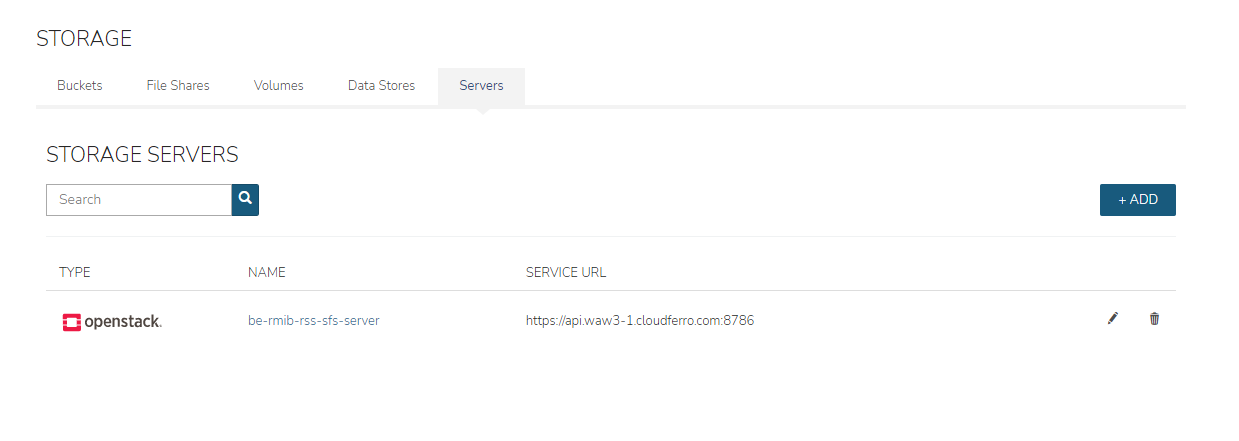
1.2. Fill the following data:
- Select TYPE as Openstack SFS
- Add a NAME as <tenant name>-sfs-server, e.g., be-rmib-rss-sfs-server
- Select the CLOUD from the list (usually you only have one)
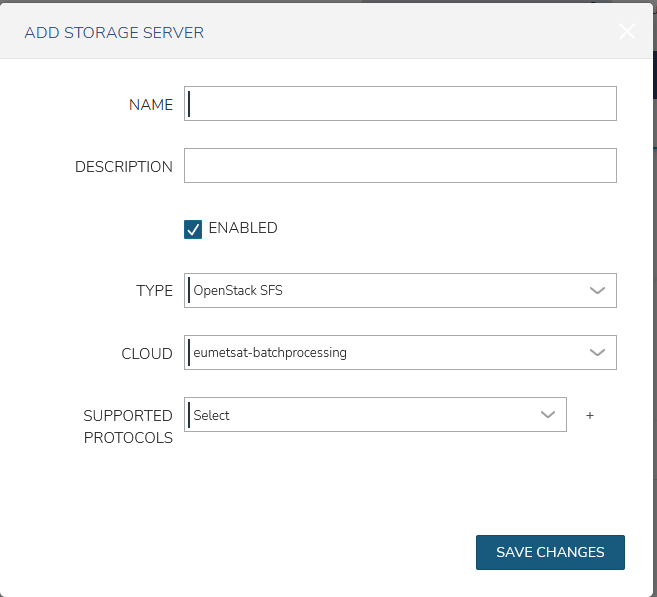
Once saved this will create the storage server.
2. Create a File share
Now that you have a storage server for SFS, you can create the File shares,
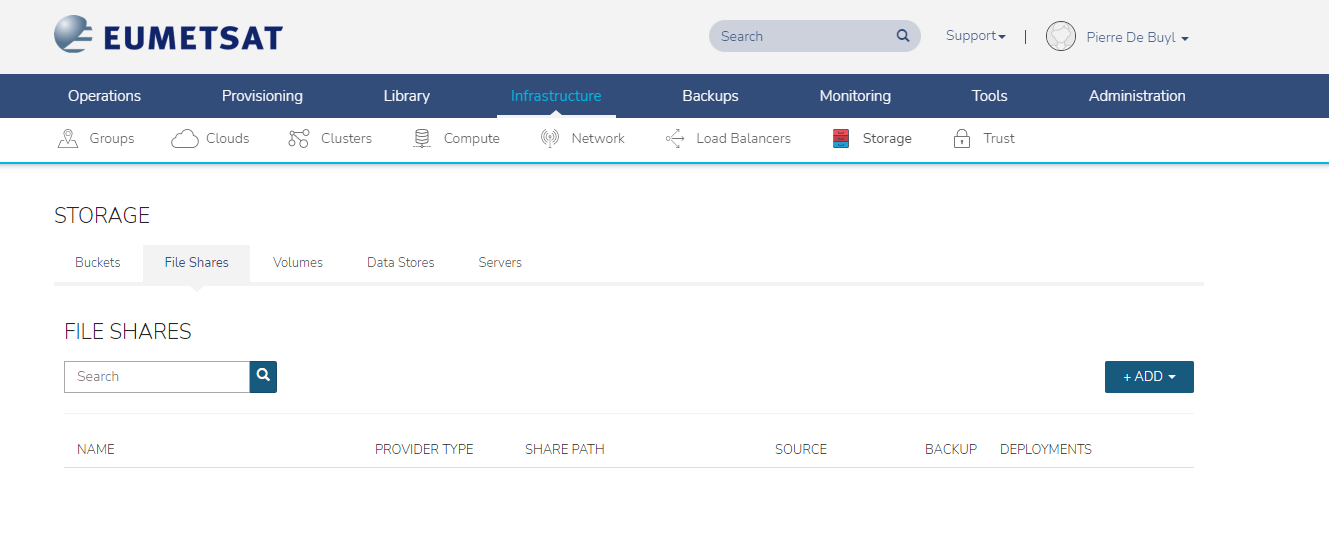
2.1 From the same page, go to the File Shares tab.
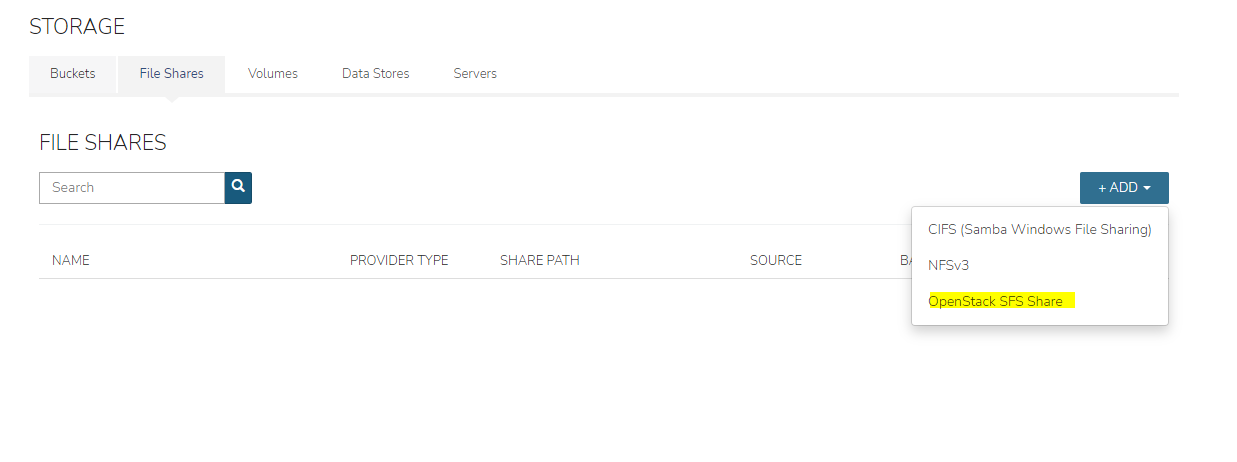
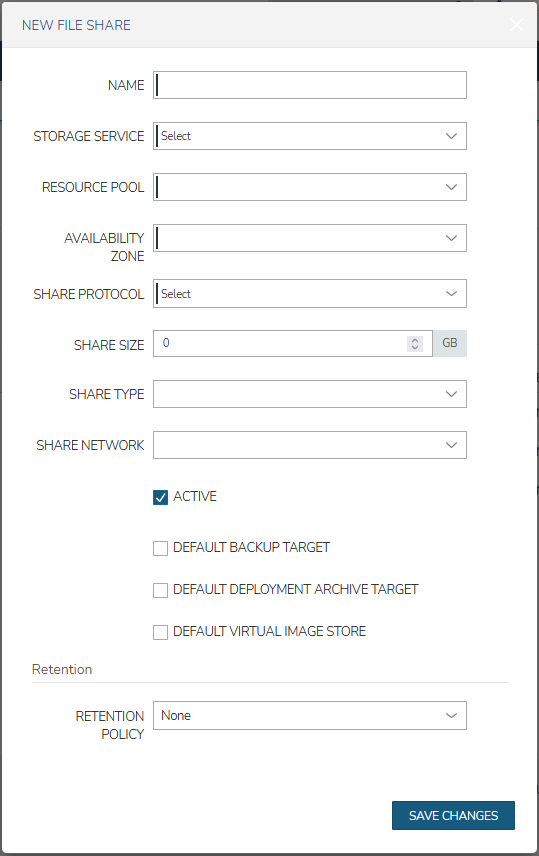
2.2 Click +ADD button to create a file share and select the Openstack SFS share
2.3 Fill the information:
...
Then click "Save Changes"
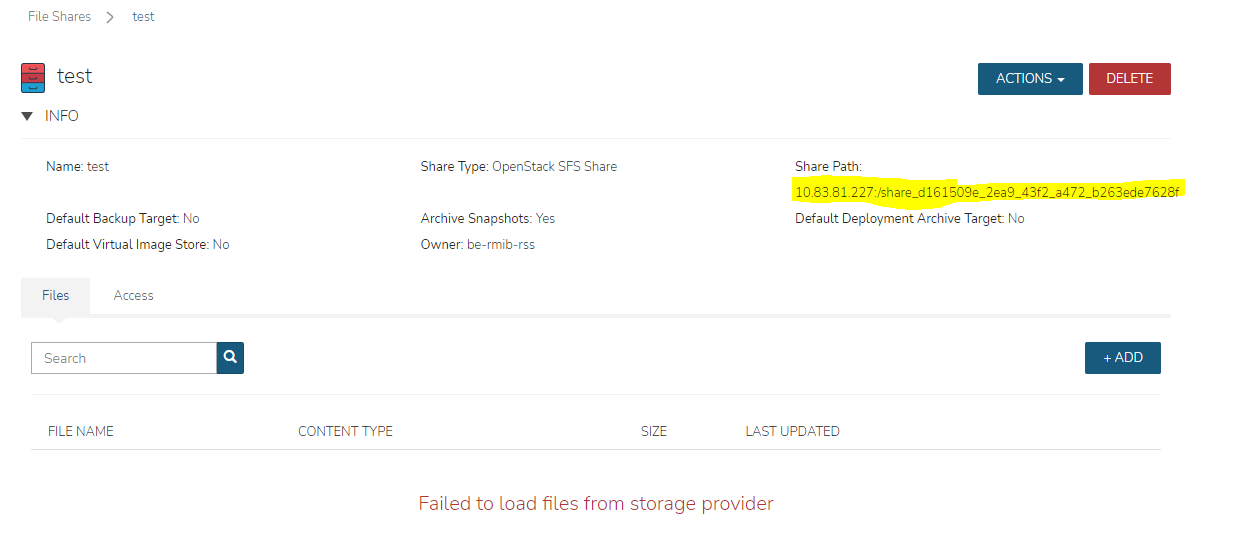
This will create the Shared Filesystem in the storage backend. Wait until you have the "Share Path:" defined in Morpheus. This will take some time.
3. Network configuration required for the VMs that need to access the SFS
Now that you have created the SFS, you can use it in a VM.
In order to do that, when provisioning a VM in Morpheus, you need to select two networks (private + sfs).
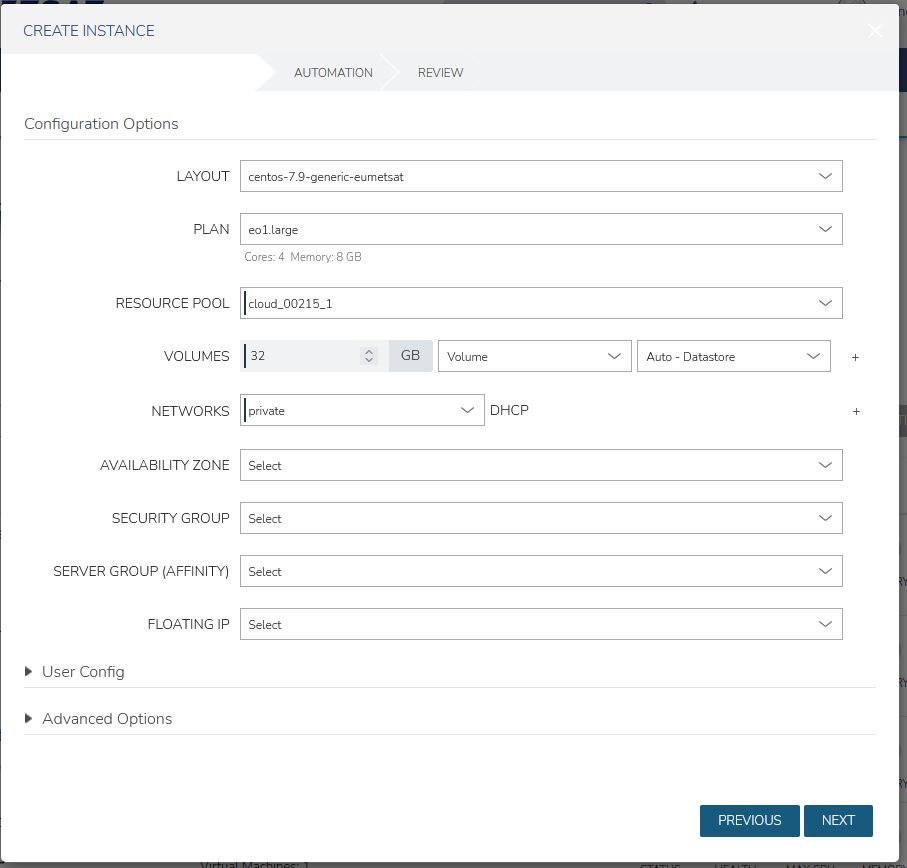
Add private first and then using the + button you will be able to add a second network: sfs network. At the end you will see something as below:

Then continue with normal provisioning.
...
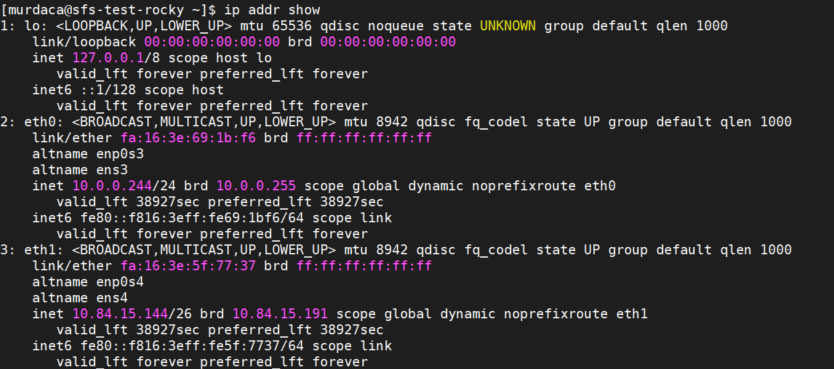
Once provisioned is finished, ssh into your machine and verify if the SFS network is up:
| Code Block |
|---|
ip addr show |
4. Adding permissions to use the Shared Filesystem
Once the Shared Filesystem is created, you need to add access rules to allow read-only or read/write operations to one machine or multiple machines.
4.1 Go to Infrastructure → Storage → File Shares, and click on the "Access" tab, then click the "+ ADD" button ...
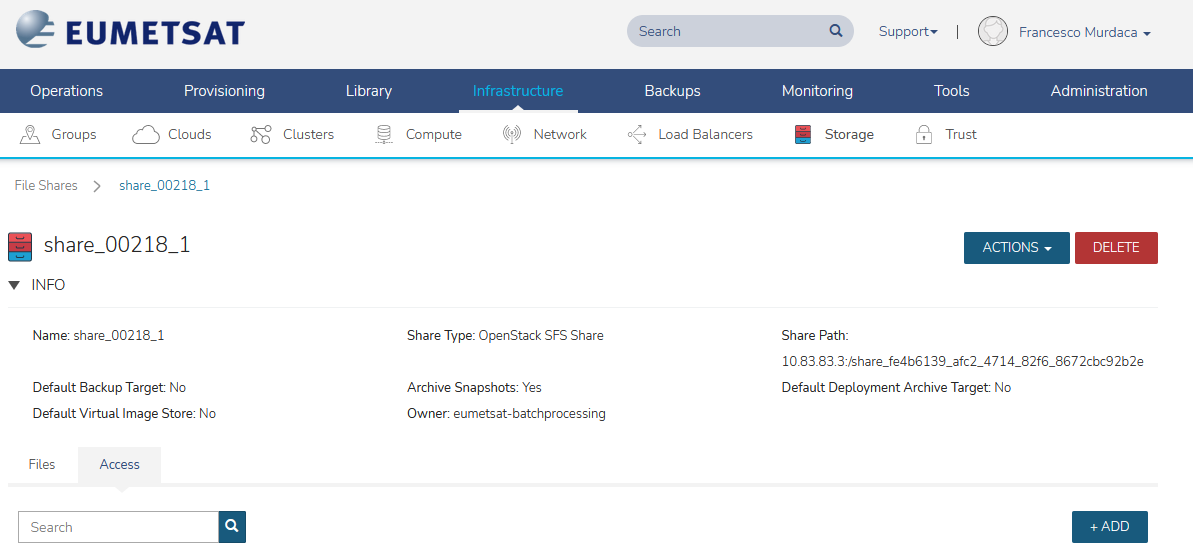
4.2 Now you can fill the required information:
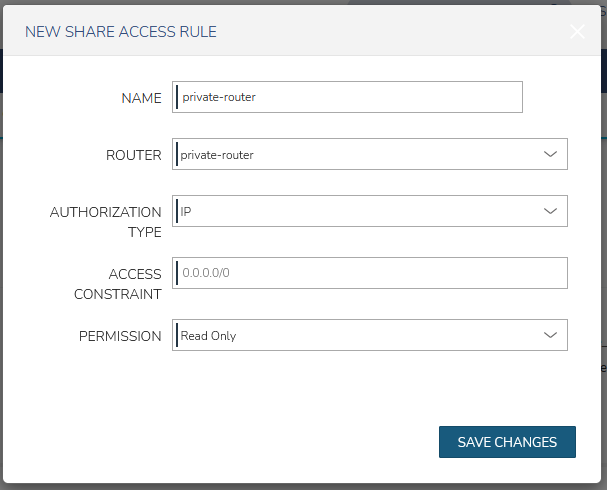
- NAME: e.g. give a meaningful name
- ROUTER: sfs router
- AUTHORIZATION TYPE: IP
- PERMISSION: Read Only or Read/Write access
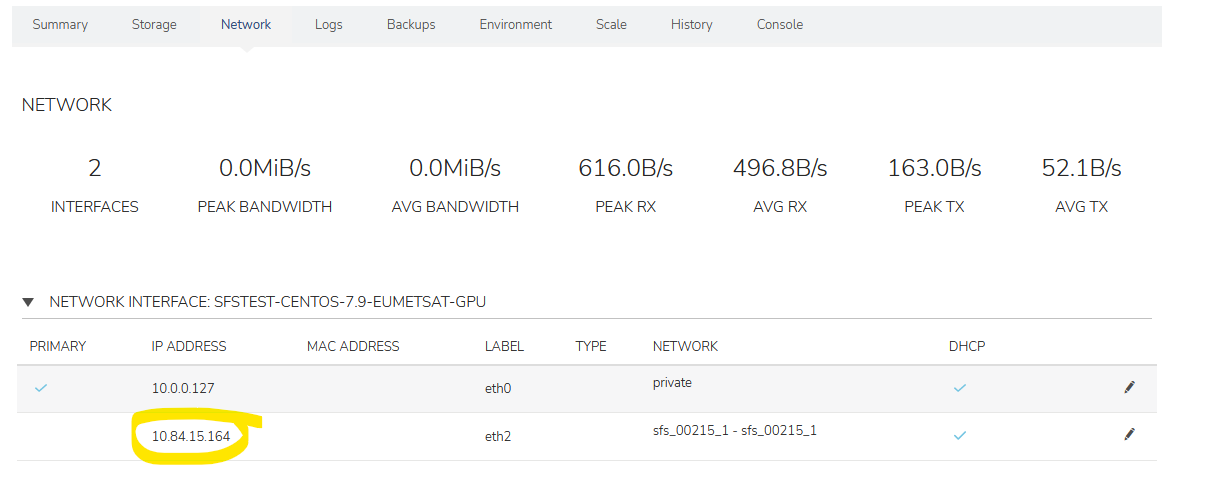
- ACCESS CONSTRAINT: Access IP of the local machine on the shared file system network (e.g. 10.84.??.??/32) or the range of IPs for all machines on the SFS network (10.84.??.0/24). In order to get the IP of your VM on the SFS network. Go to Provisioning > Instances > find your VM and click on it. Then go to network section as described below:
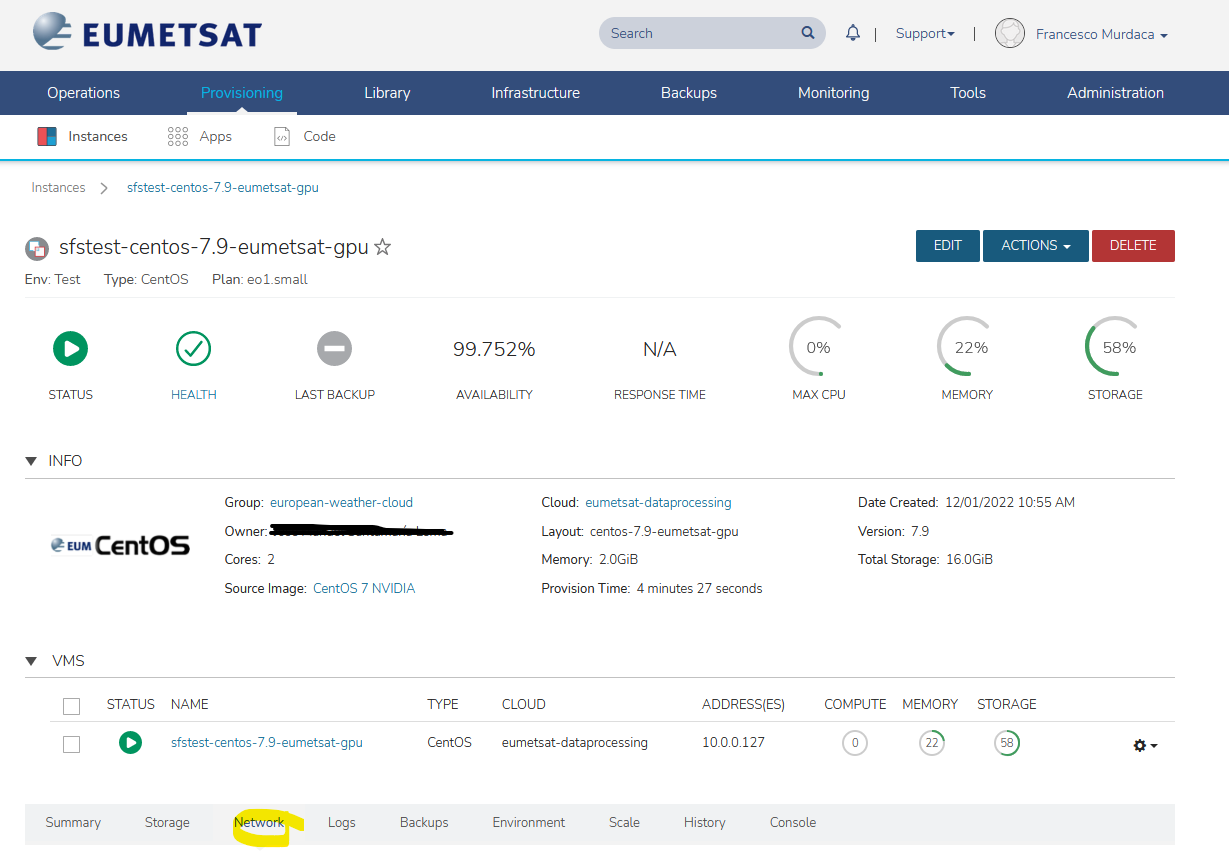
You will be able to see your private network and sfs network IPs:
5. Mount file share to VM
Now that everything is configured and permissions have been given for access, you can login into your machine and mount the shared filesystem in a VM using the following commands:
...
To test this, unmount the share with sudo umount /sfs-test and then run sudo mount -a . This should cause the share to mount again if you have everything correct, otherwise you'll see an error message. If it worked, it's then safe to reboot the machine to test mounting on boot up. If it didn't work, don't reboot until you've fixed it or commented out the entry as it may prevent a proper boot up and you'd have to look at the VM console in Morpheus to correct the problem.
6. Managing Directory Permissions
When setting up your Shared File System (SFS) share, it's important to ensure correct directory permissions to maintain security and accessibility. Below are recommendations for managing directory permissions, and you can choose the one that best fits your requirements
...