-
Created by
 Helen Setchell, last updated by Milana Vuckovic on Aug 24, 2026
3 minute read
Helen Setchell, last updated by Milana Vuckovic on Aug 24, 2026
3 minute read
High resolution
| Anomaly Correlation | RMS Error | SEEPS | ||||
|---|---|---|---|---|---|---|
| Europe | against analysis | Geopotential | 100hPa | |||
| 500hPa | ||||||
| MSL pressure | ||||||
| Temperature | 100hPa | |||||
| 200hPa | ||||||
| 850hPa | ||||||
| Wind | 100hPa | |||||
| 200hPa | ||||||
| 850hPa | ||||||
| Relative humidity | 300hPa | |||||
| 700hPa | ||||||
| against observations | Temperature | 100hPa | ||||
| 200hPa | ||||||
| 850hPa | ||||||
| 2m temperature | ||||||
| Wind | 100hPa | |||||
| 200hPa | ||||||
| 850hPa | ||||||
| 10m wind | ||||||
| 2m dew-point | ||||||
| Total cloud cover | ||||||
| 24h precipitation | ||||||
| Northern hemisphere extra-tropics | against analysis | Geopotential | 100hPa | |||
| 500hPa | ||||||
| MSL pressure | ||||||
| Temperature | 100hPa | |||||
| 200hPa | ||||||
| 850hPa | ||||||
| Wind | 100hPa | |||||
| 200hPa | ||||||
| 850hPa | ||||||
| 10m wind over ocean | ||||||
| Ocean wave height | ||||||
| Ocean wave period | ||||||
| Relative humidity | 300hPa | |||||
| 700hPa | ||||||
| against observations | Temperature | 100hPa | ||||
| 200hPa | ||||||
| 850hPa | ||||||
| 2m temperature | ||||||
| Wind | 100hPa | |||||
| 200hPa | ||||||
| 850hPa | ||||||
| 10m wind | ||||||
| 2m dew-point | ||||||
| Total cloud cover | ||||||
| 24h precipitation | ||||||
| Southren hemisphere extra-tropics | against analysis | Geopotential | 100hPa | |||
| 500hPa | ||||||
| MSL pressure | ||||||
| Temperature | 100hPa | |||||
| 200hPa | ||||||
| 850hPa | ||||||
| Wind | 100hPa | |||||
| 200hPa | ||||||
| 850hPa | ||||||
| 10m wind over ocean | ||||||
| Ocean wave height | ||||||
| Ocean wave period | ||||||
| Relative humidity | 300hPa | |||||
| 700hPa | ||||||
| against observations | Temperature | 100hPa | ||||
| 200hPa | ||||||
| 850hPa | ||||||
| 2m temperature | ||||||
| Wind | 100hPa | |||||
| 200hPa | ||||||
| 850hPa | ||||||
| 10m wind | ||||||
| 2m dew-point | ||||||
| Total cloud cover | ||||||
| 24h precipitation | ||||||
| Tropics | against analysis | Temperature | 100hPa | |||
| 200hPa | ||||||
| 850hPa | ||||||
| Wind | 100hPa | |||||
| 200hPa | ||||||
| 850hPa | ||||||
| 10m wind over ocean | ||||||
| Ocean wave height | ||||||
| Ocean wave period | ||||||
| Relative humidity | 300hPa | |||||
| 700hPa | ||||||
| against observations | Temperature | 100hPa | ||||
| 200hPa | ||||||
| 850hPa | ||||||
| 2m temperature | ||||||
| Wind | 100hPa | |||||
| 200hPa | ||||||
| 850hPa | ||||||
| 10m wind | ||||||
| 2m dew-point | ||||||
| Total cloud cover | ||||||
| 24h precipitation |
Extended HRES scorecard
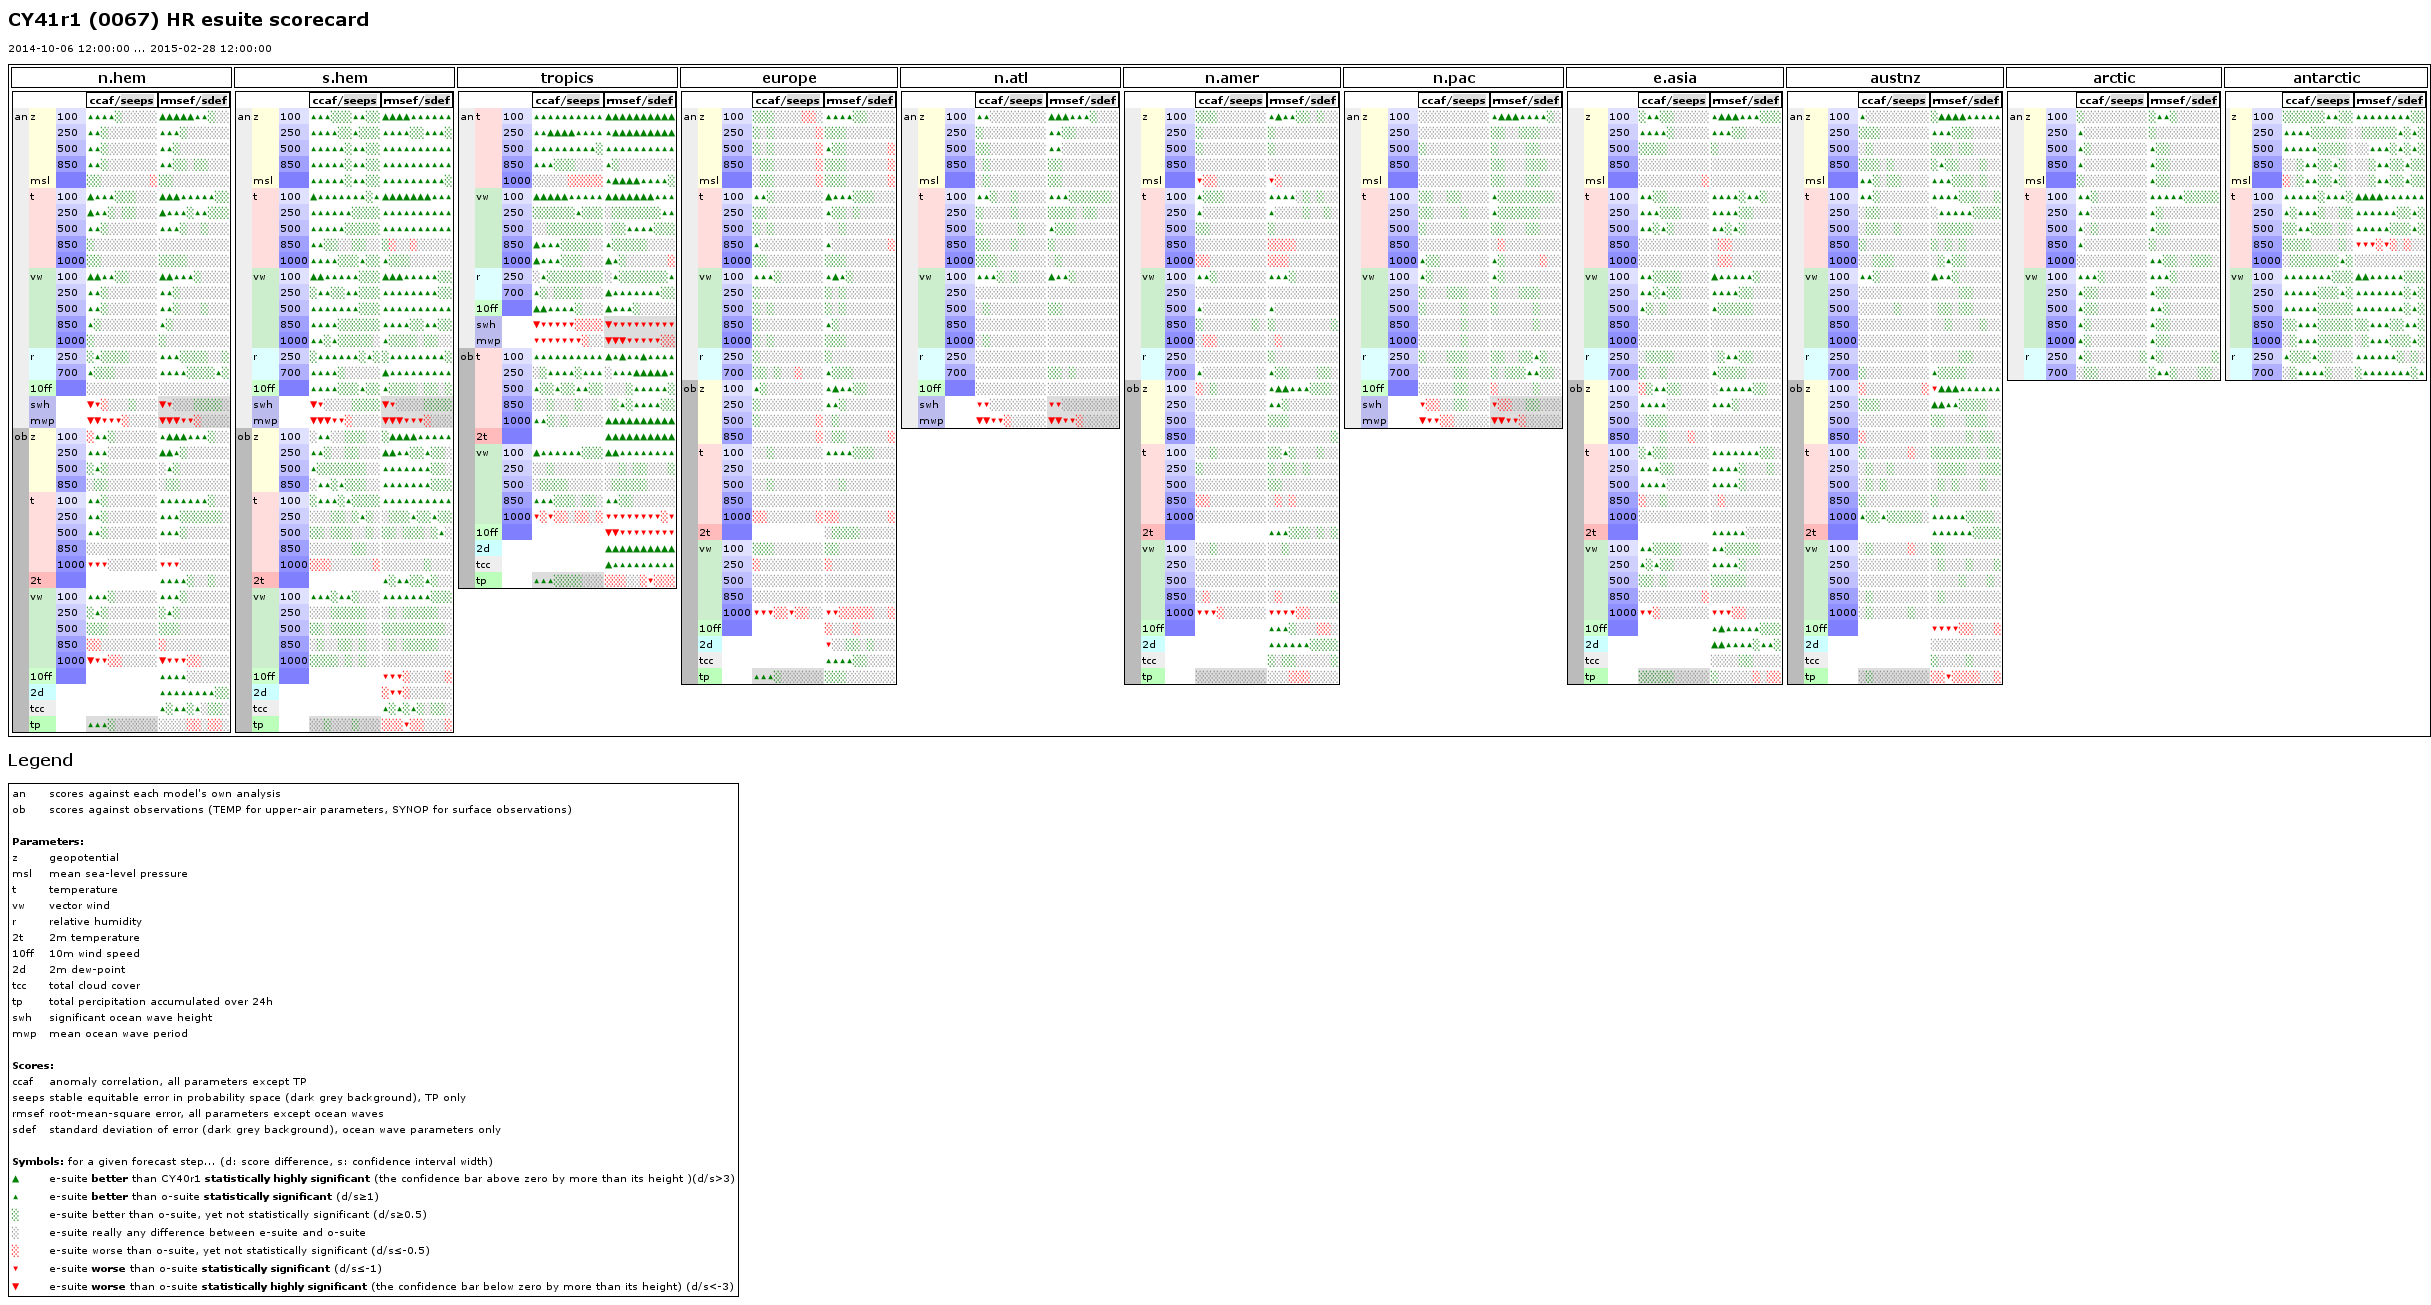
Comparison for additional domains can be found in the extended HRES scorecard (PNG image).
Ensemble
| Continuous Rank Probability Score | |||
|---|---|---|---|
| Europe | Wind speed | 850hPa | |
| Temperature | |||
| Geopotential | 500hPa | ||
| 1000hPa | |||
| Northern hemisphere extra-tropics | Wind speed | 850hPa | |
| Temperature | |||
| Geopotential | 500hPa | ||
| 1000hPa | |||
| Southren hemisphere extra-tropics | Wind speed | 850hPa | |
| Temperature | |||
| Geopotential | 500hPa | ||
| 1000hPa | |||
| Tropics | Wind speed | 850hPa | |
| Temperature |
Score card provides a quick visual overview over the performance of the CY41r1 scores compared to CY40r1. It is a simplified summary of verify error plots of various domains, scores, parameters etc. Each error plot is converted into a sequence of symbols (e.g. ) where each symbol indicates for a given time step whether or not the CY41r1 is significantly better or worse than the CY40r1. |