...
After you log in successfully to the K8S service, you will be redirected to the main dashboard, where you can start creating and managing clusters. Here's a quick description of the Dashboard:

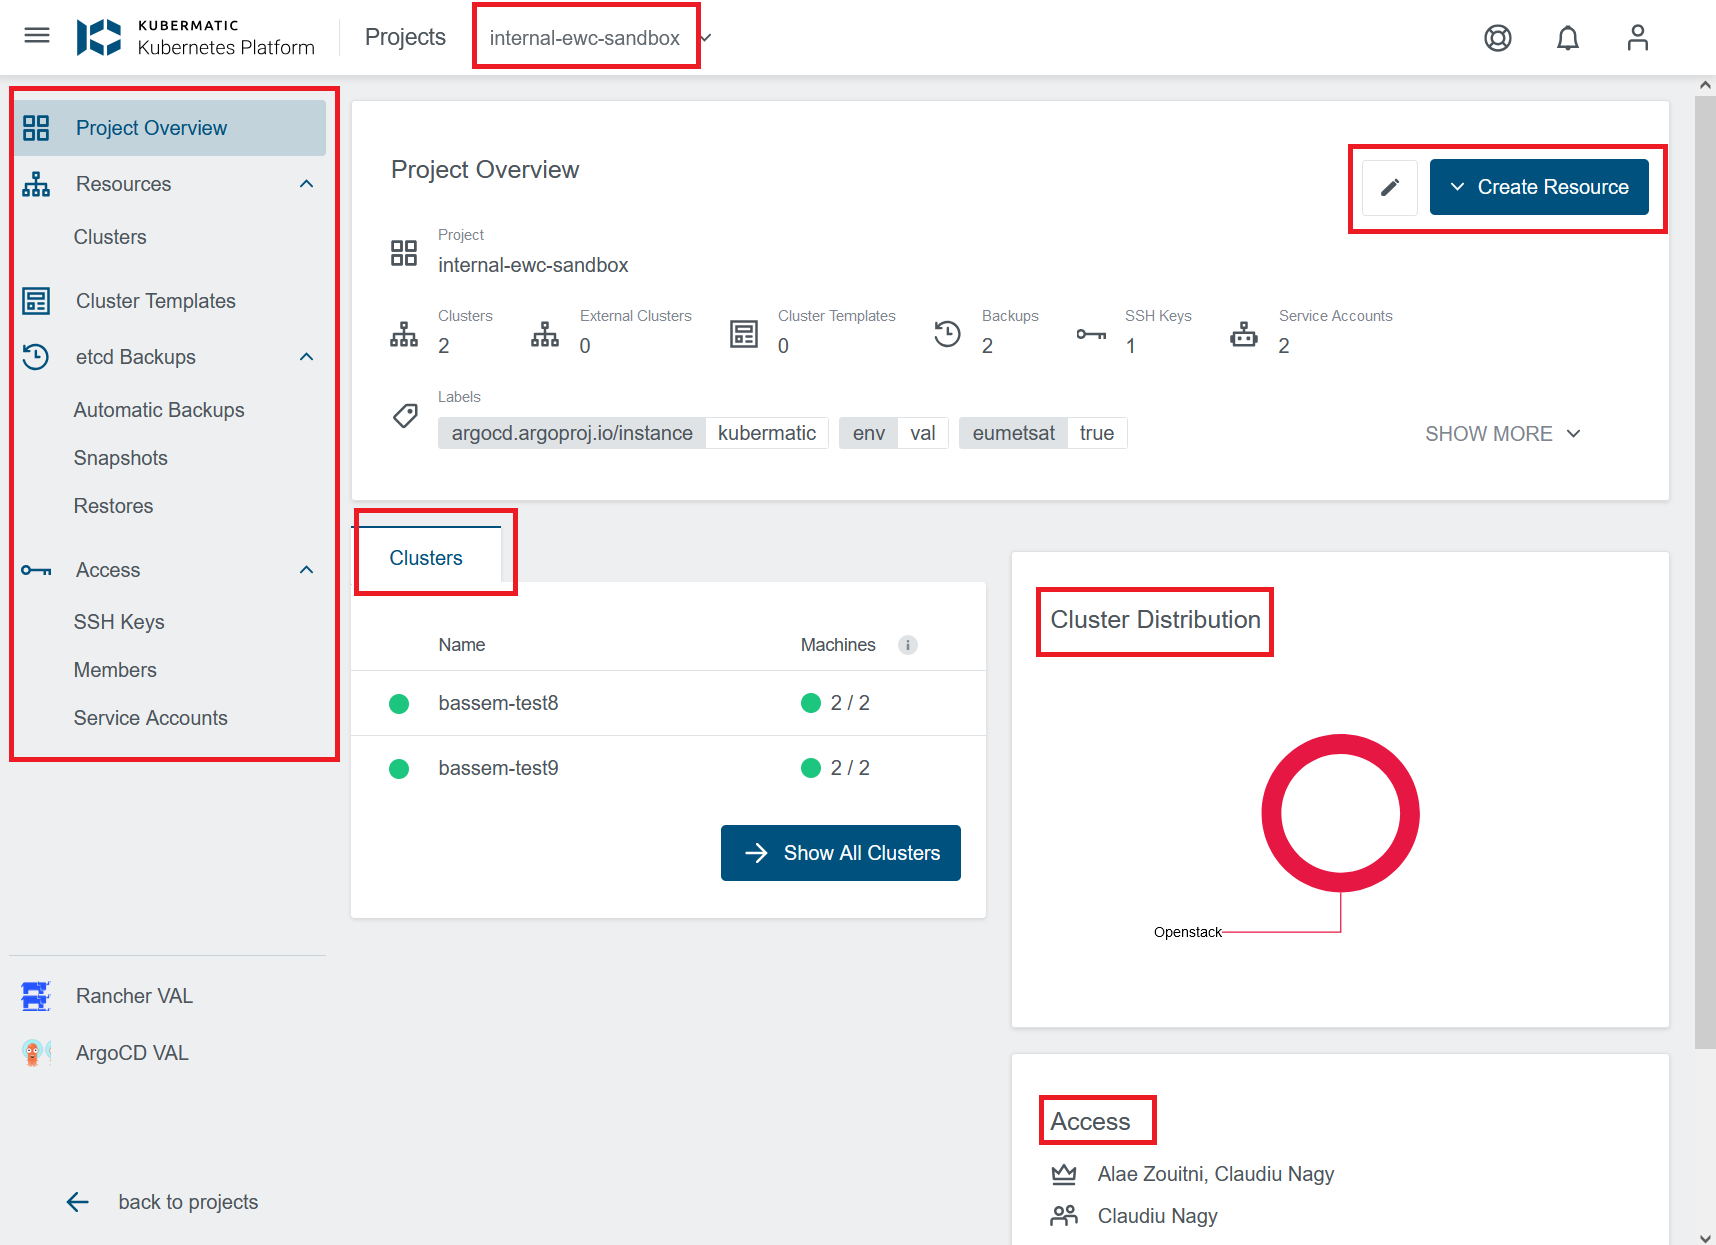
- Menu:
The left sidebar contains navigation options for managing your project and resources, including: Project Overview, Resources, Clusters, Access, etc.
...
- Click on Create Resource at the top-right corner of the dashboard and select New Cluster, or
- Navigate to the Clusters section in the menu and click on Create Cluster.


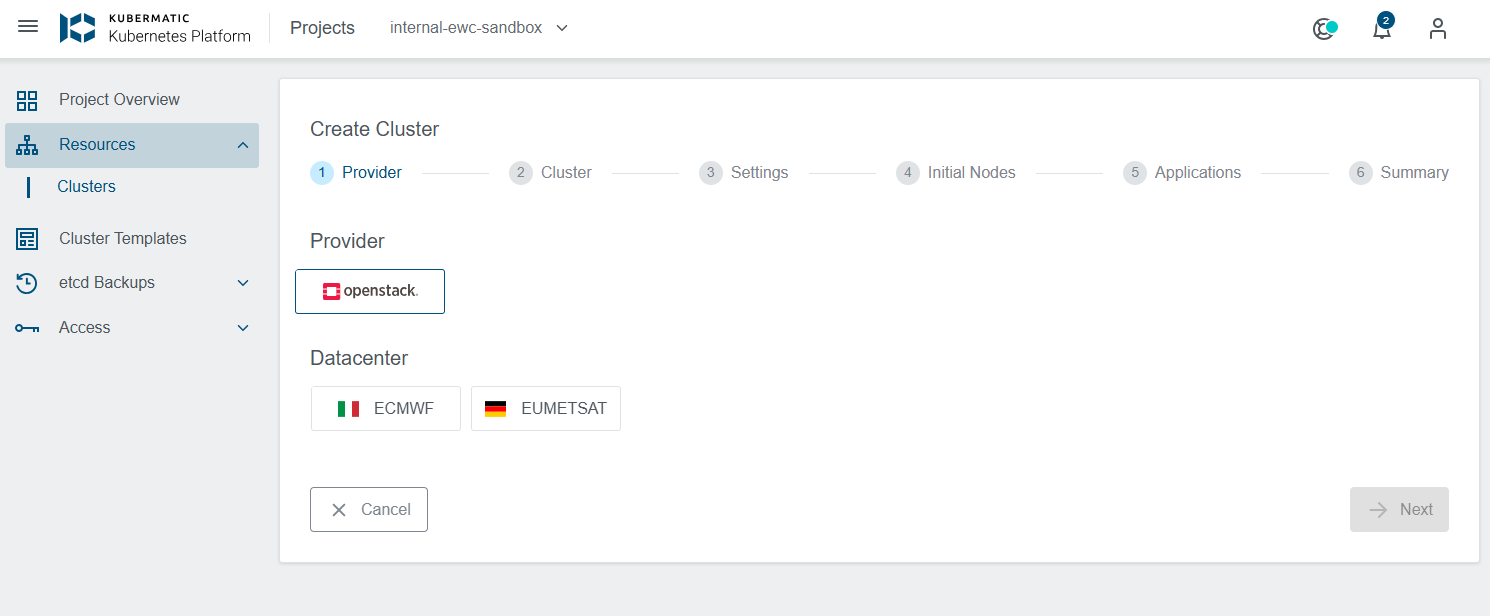
You will then be redirected to the first page, where you can begin configuring and creating your cluster.
- In the first step of creating a cluster, you select the Provider for your cluster (OpenStack):


- You then select the Datacenter where your cluster will be deployed - depending on the location of your tenancy/cloud - one of the ECMWF or EWC-EUMETSAT Datacenters.

- In this next step, you will provide a name for your cluster and customize the settings as needed.
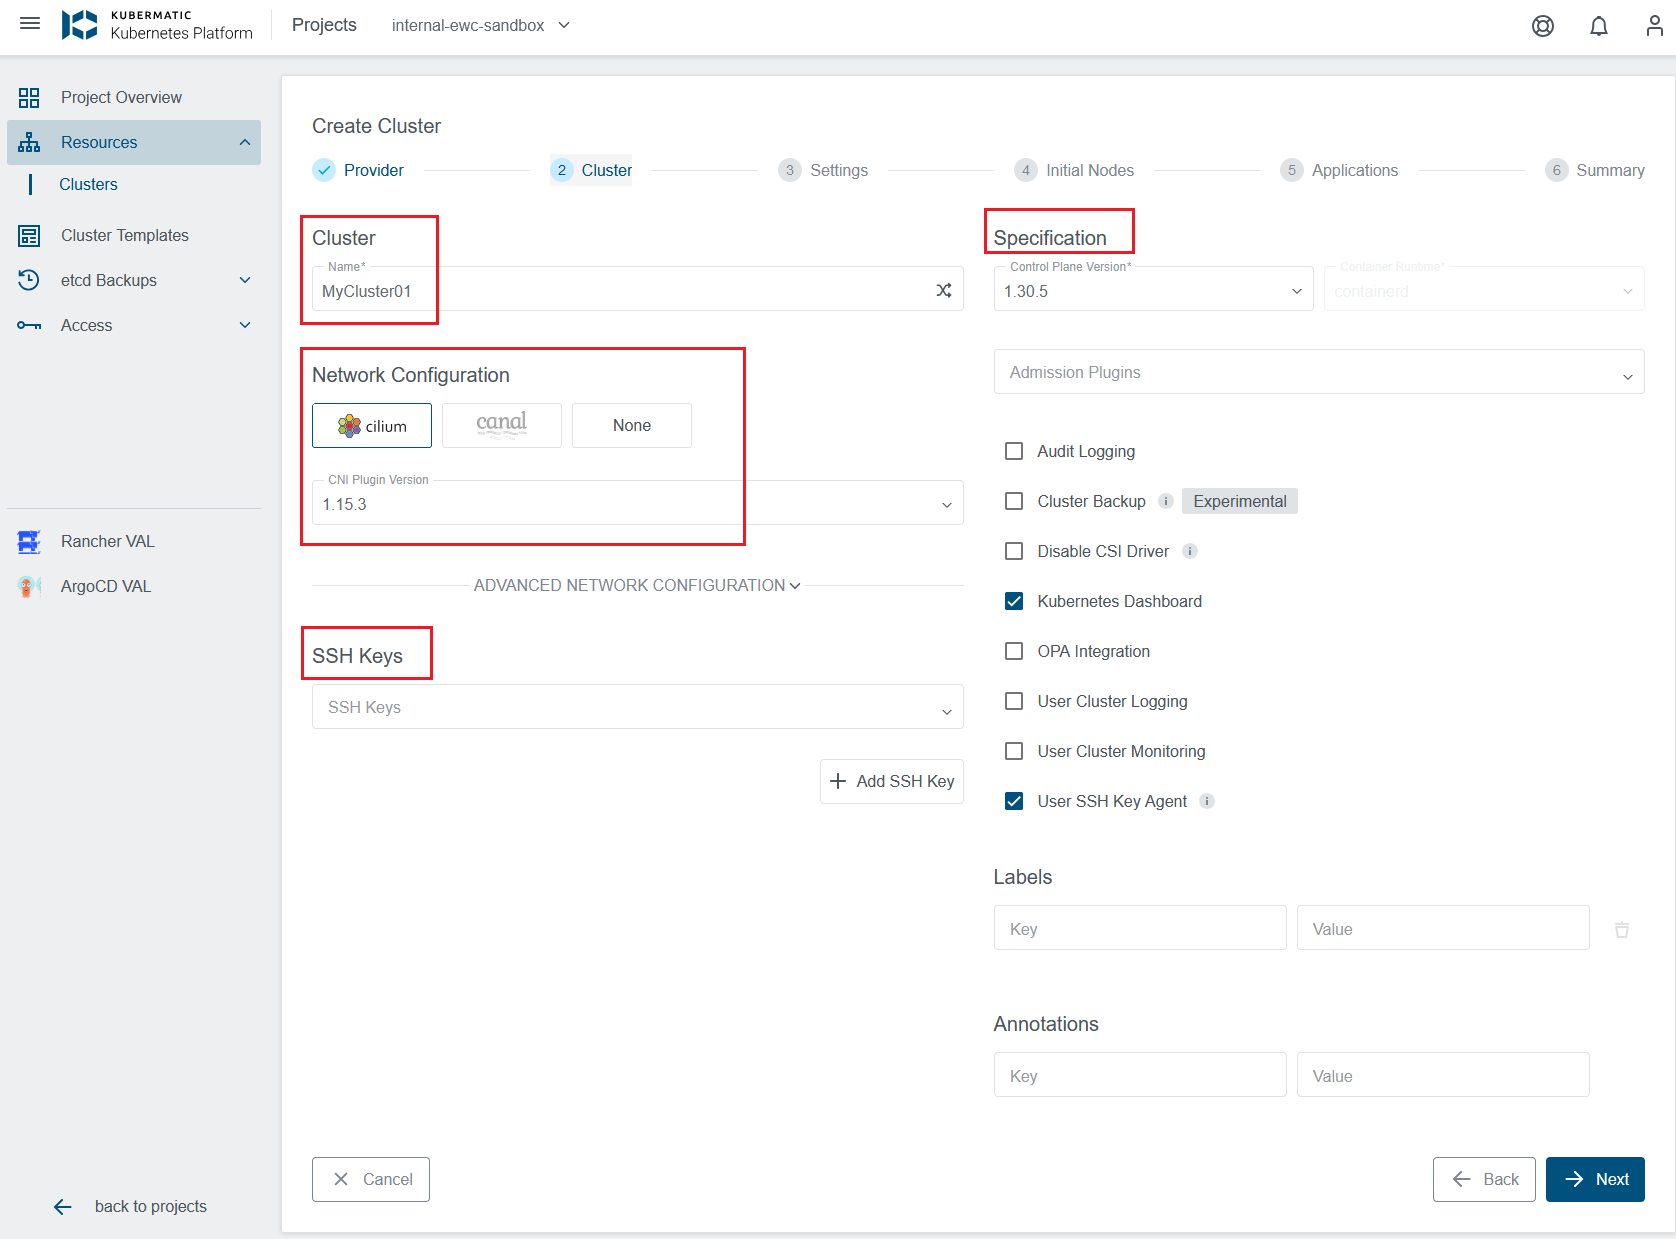

Here you can:
- Configure the CNI (Cluster Network Interface) and adapt the cluster network settings.
- Select the Kubernetes version and container runtime.
- Assign SSH keys and add labels or annotations to organize your cluster.
- Enable optional features like Audit Logging, OPA Integration, User Cluster Monitoring, or Logging and Alerting.
Once your settings are configured, click Next to proceed to the next step. - In this step, the select the Provider Preset is automatically set to your project's tenancy name, so there is no need to manually enter credentials. Simply matching your tenancy name which will contains all the relevant credentials. Optionally tick the Enable Ingress Hostname checkbox (This is a workaround related to the OpenStack CCM - usually needed when the cluster workload needs to access internal resources through the external LoadBalancer, e.g. Cert Manager). Then click Next to proceed:


- You are then redirected to configure the initial nodes for your cluster, including the node name, size, operating system, and other settings such as OpenStack specifications (flavor, disk size, image, etc.). You can also set up autoscaling, assign labels and annotations for organization, or use taints which is a property that allows your node to repel certain pods.


- In this step, you can optionally select applications to be installed in your cluster. Once the infrastructure is provisioned and the cluster is ready, The system will automatically deploy the chosen applications.


- Finally, a cluster summary screen will be displayed, allowing you to review all settings and confirm that everything is correct. If all is confirmed, you can proceed to Create Cluster:
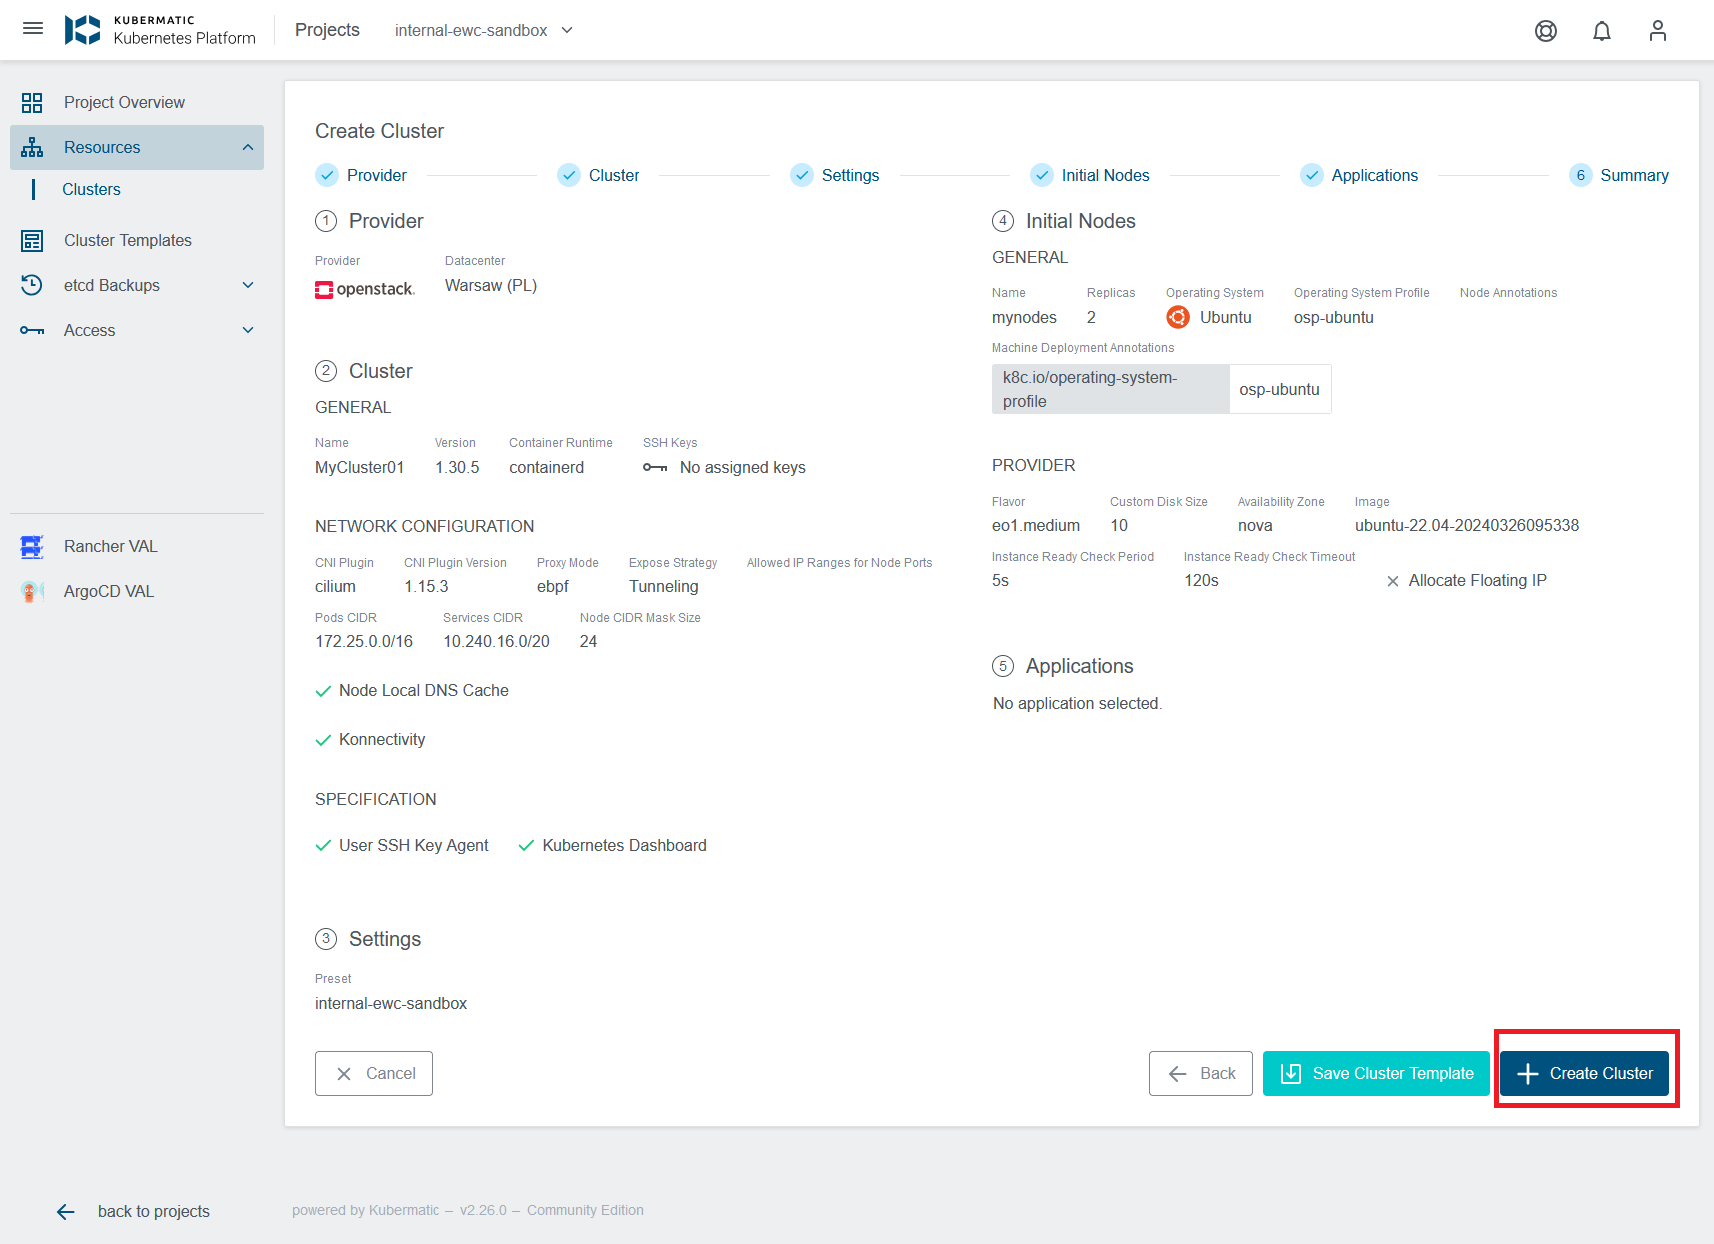

Note: You can also save the current configuration as a Cluster Template by clicking the Save Cluster Template button. This allows you to reuse the same settings for creating additional clusters in the future. - You will then see the progress of the cluster creation along with all its components being provisioned.
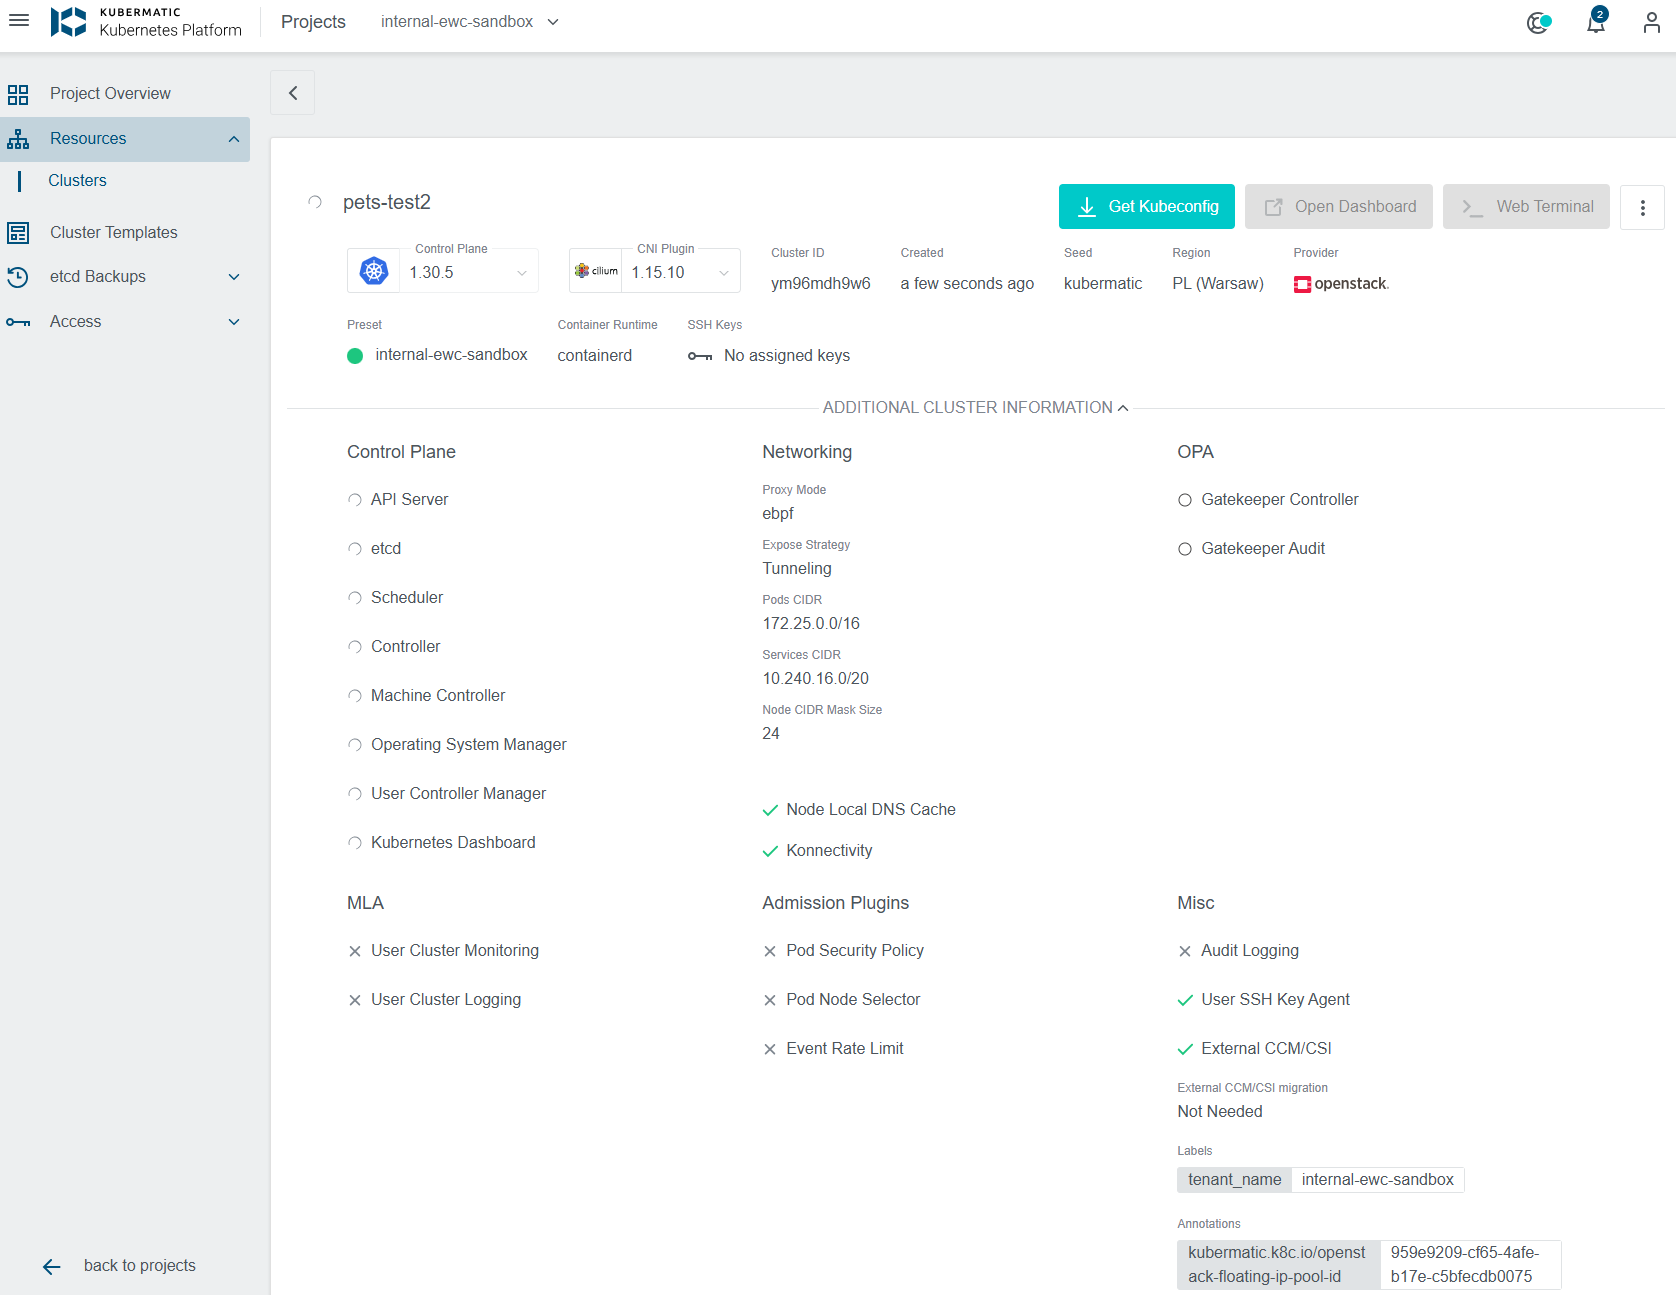

Warning messages will appear at the bottom during the cluster provisioning. These can be typically ignored during the first few minutes of the cluster provisioning process. - Once the cluster is fully created and all components are ready, it will appear on the list of Clusters. At this point, you can download the Kubeconfig and start using and managing your cluster (see: EUMETSAT EWC Managed Kubernetes Service - Connecting and interacting with Clusters).