...
- To get started, simply click the + Add button in the upper right of the Provisioning - Instances section. A modal will display allowing the catalogue to be searched. Once an item is selected it is just a matter of following the steps through the wizard.

- Select the type of instance. At the moment only the following types are available
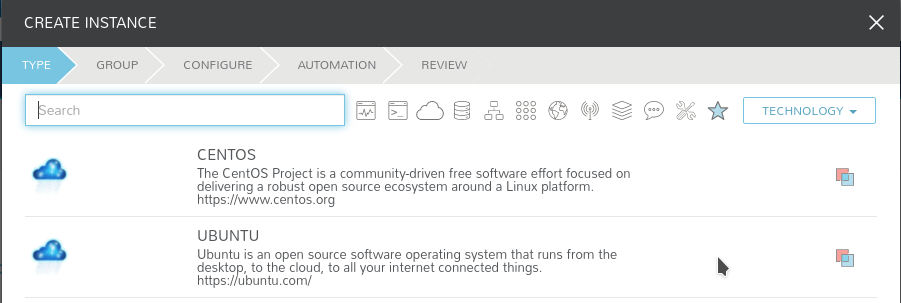 :
: 
Info Rocky 8 and 9 are both available as layouts, once you select rocky linux
Select the cloud you want to provision your instance on, and give it a name. The environment tag and tags are optional for your own reference.

If you are provisioning at EUMETSAT:
Warning If you are using LDAP VM (EUMETSAT tenancy: Default setup), VM names need to satisfy the following requirements:
only letters, numbers, '-' are allowed in VM nameInfo Don't use too long name for the instances. the Fully Qualified Domain Name (FQDN): {instance_name}.{domain}
cannot be longer than 64 characters on systemd servers, so you should use not too long names.You can add description about the instance in the Description of the instance once the instance is deployed. Go to you instance, click Edit button, add the Description and Save.- Now is time to configure your instance.

- Layout: this is the flavour you want to use. The ones tagged with data will come with some preinstalled software to access and manipulate data.
- Plan: How much resources do you need on the VM. You may choose amongst a fixed set of different configurations. See here the list of plans.
- You may configure additional volumes besides the default root one.
- Network setup
- If you are provisioning at ECMWF, you will have 3 two networks available to choose from.
- public or external-internet: access to the Internet with public IP. Must have if you want to connect to the VM directly.data: fast access to the data storage. Must have if you want to use MARS.
private or private-<tenant>private: local private network within the tenant.
Warning Always choose public first, otherwise Morpheus might not be able to discover the VM once it is provisioned.

Tip You may also choose to have only private network, and associate a Floating IP from the public or external-internet.
You must leave Floating IP empty if you have attached your instance to the public or external-internet network.
- If you are provisioning at EUMETSAT
First, select the private network, then if you like to have access to VM directly (public network), select "external" under the Floating IP dropdown menu. 
- If you are provisioning at ECMWF, you will have 3 two networks available to choose from.
- On availability zone, select nova.
- You may as well select the security group that better suits your needs from a predefined list. Security groups are sets of applied IP filter rules which define networking access to the instance.

- You may configure more additional settings in the following sections, but default values should be fine. Click NEXT.
- Apply any additional workflow you may need.
- Review and click COMPLETE

...