...
- To get started, simply click the + Add button in the upper right of the Provisioning - Instances section. A modal will display allowing the catalogue to be searched. Once an item is selected it is just a matter of following the steps through the wizard.

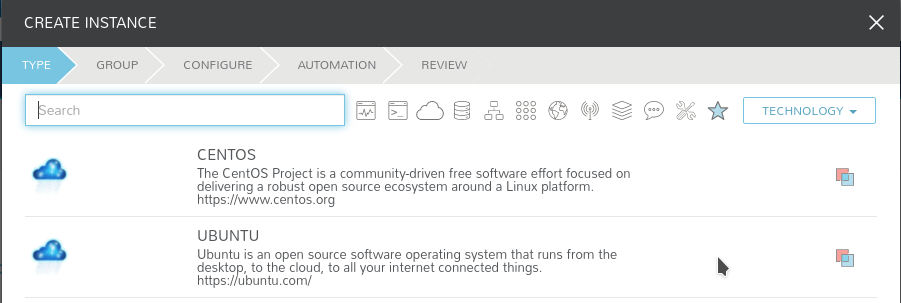
- Select the type of instance. At the moment only the following types are available
Select the cloud you want to provision your instance on, and give it a name. The environment tag and tags are optional for your own reference.

If you are provisioning at EUMETSAT:
Warning If you are using LDAP VM (EUMETSAT tenancy: Default setup), VM names need to satisfy the following requirements:
only letters, numbers, '-' are allowed in VM name- Now is time to configure your instance.

- Layout: this is the flavour you want to use. The ones tagged with data will come with some preinstalled software to access and manipulate data.
- Plan: How much resources do you need on the VM. You may choose amongst a fixed set of different configurations.
- You may configure additional volumes besides the default root one.
- Network setup
- If you are provisioning at ECMWF, you will have 3 networks available to choose from.
- public: access to the Internet with public IP. Must have if you want to connect to the VM directly.
- data: fast access to the data storage. Must have if you want to use MARS.
private: local private network within the tenant.
Warning Always choose public first, otherwise Morpheus might not be able to discover the VM once it is provisioned.

- If you are provisioning at EUMETSAT
First, select the private network, then if you like to have access to VM directly (public network), select "external" under the Floating IP dropdown menu. 
- If you are provisioning at ECMWF, you will have 3 networks available to choose from.
- On availability zone, select nova. You may as well select the security group that better suits your needs from a predefined list.

- You may configure more additional settings in the following sections, but default values should be fine. Click NEXT.
- Apply any additional workflow you may need.
- Review and click COMPLETE

...