You may want to create additional storage volumes or disks to attach to your VMs in addition to the root volume where the operating system resides.
Those will only be visible and mountable from that particular VM, so if you want to share this storage with other VMs, you may want to expose it through NFS.
Creating the instance
If you haven't created the instance yet, this is how you can provision extra volumes along with the creation of the instance itself
- Follow the steps described in Provision a new instance - web
- When configuring the volumes, create a new one clicking on the + sign and customise the label and size

- Complete the process until the new instance is up and running.
Existing instances
If you want to expand the storage of an existing instance with extra volumes, you can do so following these steps:
Before you begin, make sure the VM you will alter is ready for being rebooted! It may be better to shut it down cleanly.
- In the web portal, go to Provision - Instances and click on the instance you want to fix.
- Click on the ACTIONS button on the upper-right side, and select Reconfigure from the drop-down menu.
- Create a new volume by clicking on the + sign and customise the label and size, then click reconfigure
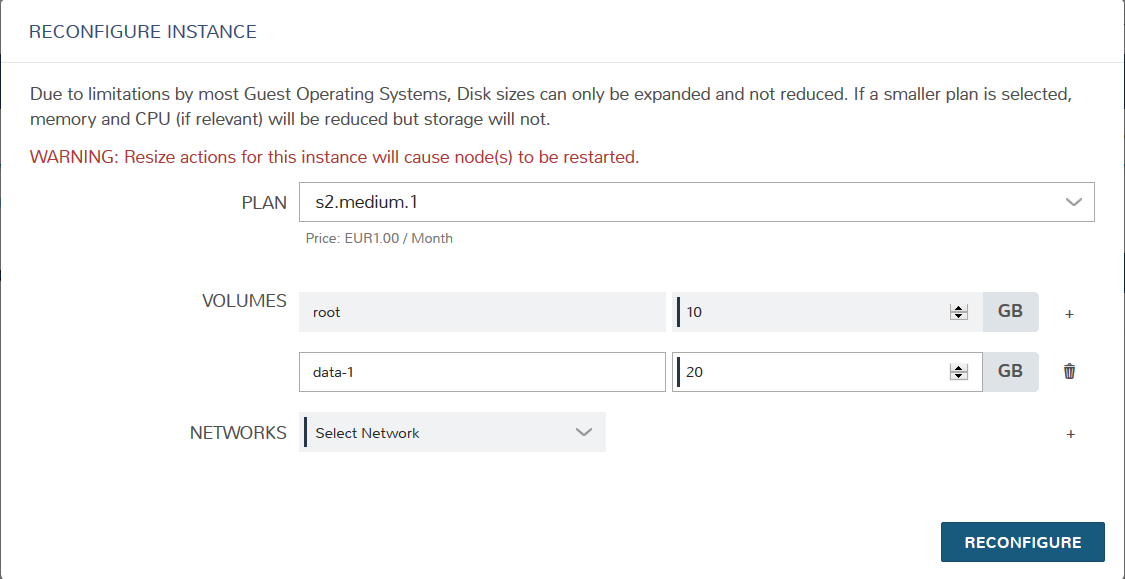
Here, we're adding a new 20GB disk (not usefully) named "data-1"
- The VM will be stopped, the disk added and the VM restarted
Configuring the extra volume in the instance
That extra volume is not mounted (or even formatted) by default. You must log in to your freshly created instance, and then follow the instructions below:
- You may need to trigger a rescan of the new block device, typically named vd*. We assume here the name of the extra volume is vdb:
sudo echo 1 > /sys/class/block/vdb/device/rescan
or, alternatively:
sudo apt-get install scsitools # or yum install scitools for CentOS
sudo rescan-scsi-bus.sh
Then you will be able to see the vdb disk when you run lsblk.
Create a partition and format it. You may use parted and mkfs.ext4:
sudo parted -s -a optimal -- /dev/vdb mkpart primary ext4 0% 100%
sudo mkfs.ext4 /dev/vdb1
You may partition the disk differently and use any other filesystem type.
Add this entry to your VM's /etc/fstab:
echo "/dev/vdb1 /data1 ext4 defaults 0 0" | sudo tee -a /etc/fstab > /dev/null
If your VM uses disk IDs then use the following command to find the vdb ID and amend the line above as required:
echo "UID-$(blkid /dev/vdb) /data1 ext4 defaults 0 0" | sudo tee -a /etc/fstab > /dev/null
Make the directory where you are mounting your filesystem. Make sure you use the same path as defined in fstab:
sudo mkdir /data1
Mount the file system
sudo mount -av
Related articles